
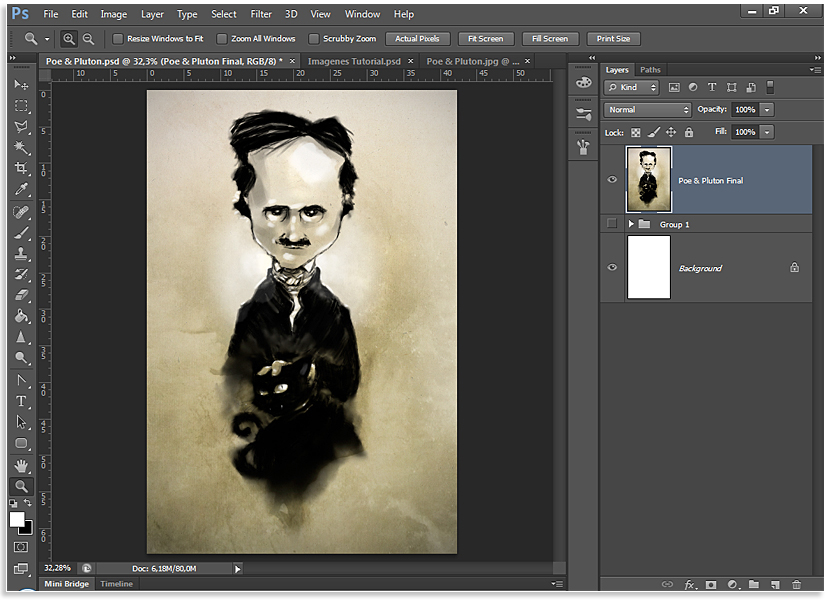
Final Image Preview
On this tutorial we will make a Poe and Pluton cartoon portrait, using custom brushes created by ourselves

Tutorial Assets
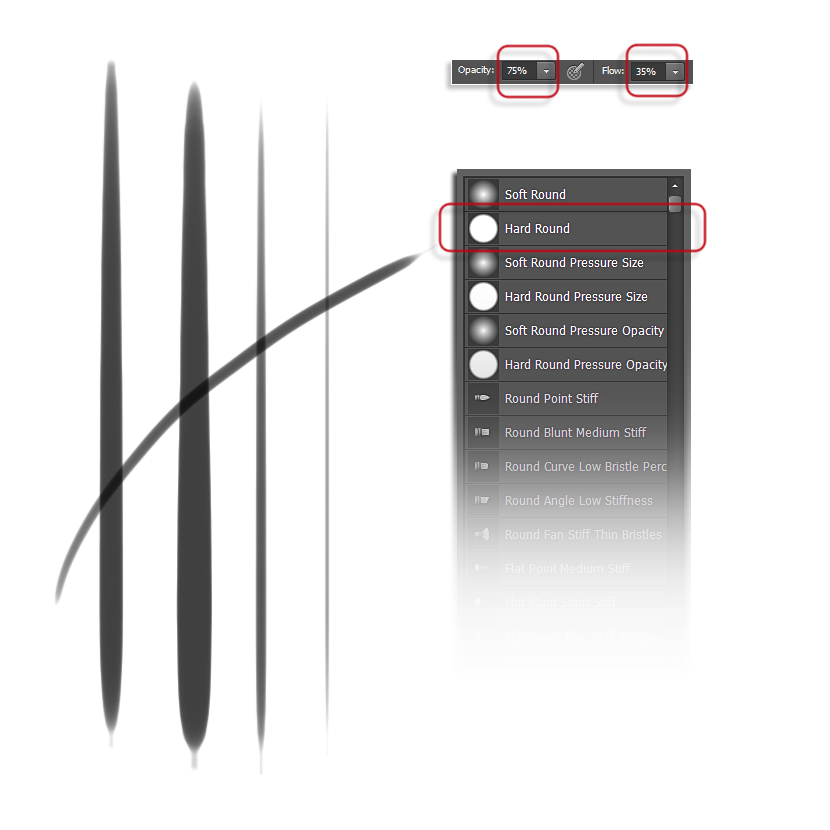
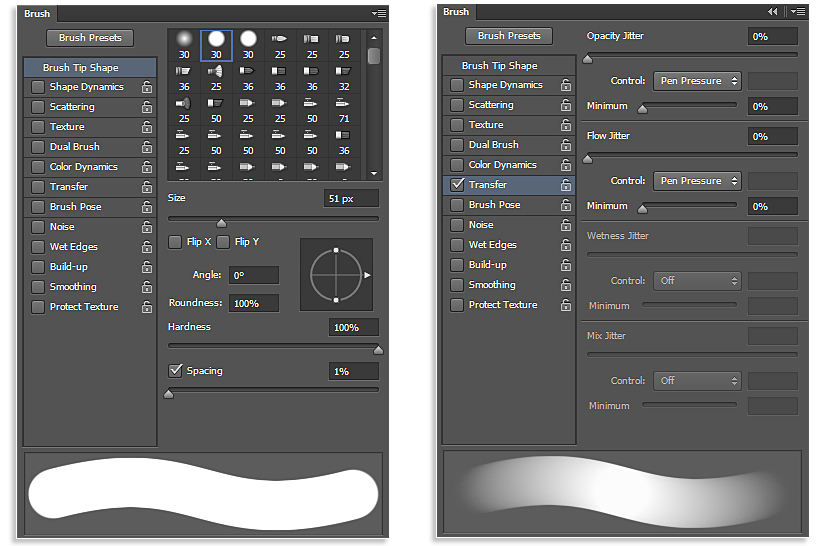
Step 1
Open a new document of 1800px high and 1200px wide. First, we will set up what will be the brush that we are going to use to draw the general lines, from the Brush Selector pick the brush no.30, Hard Round, and set its opacity to 75% and Flow to 35%.
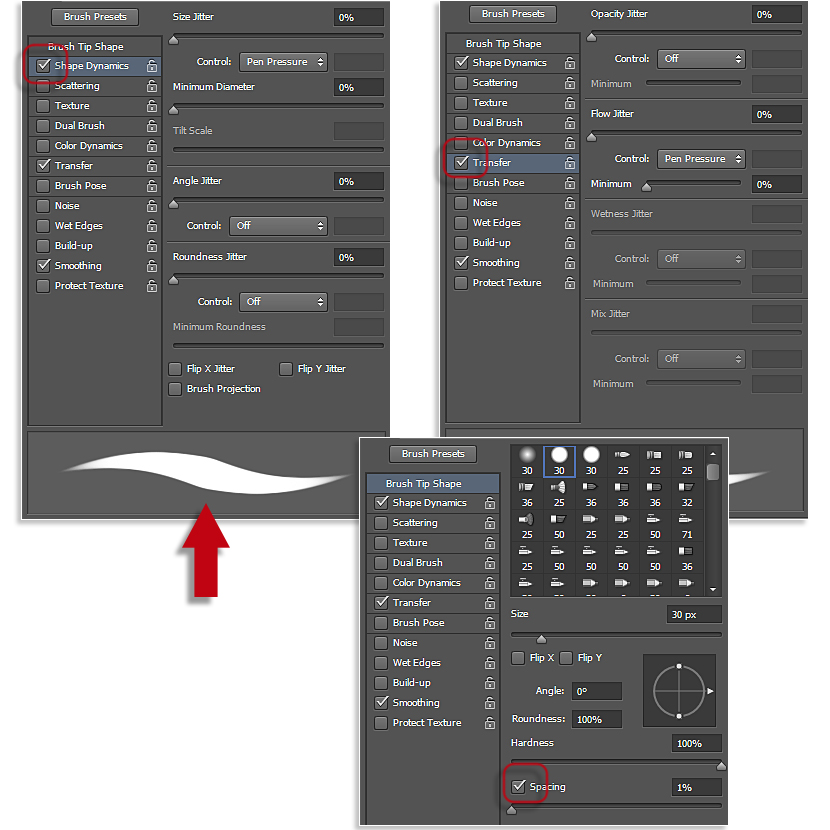
Step 2
Now, on the Brush Presets menu (F5), make the following settings, check the Shape Dynamics and Transfer boxes, and adjust Spacing to 1%. You can see the final shape of the Brush.
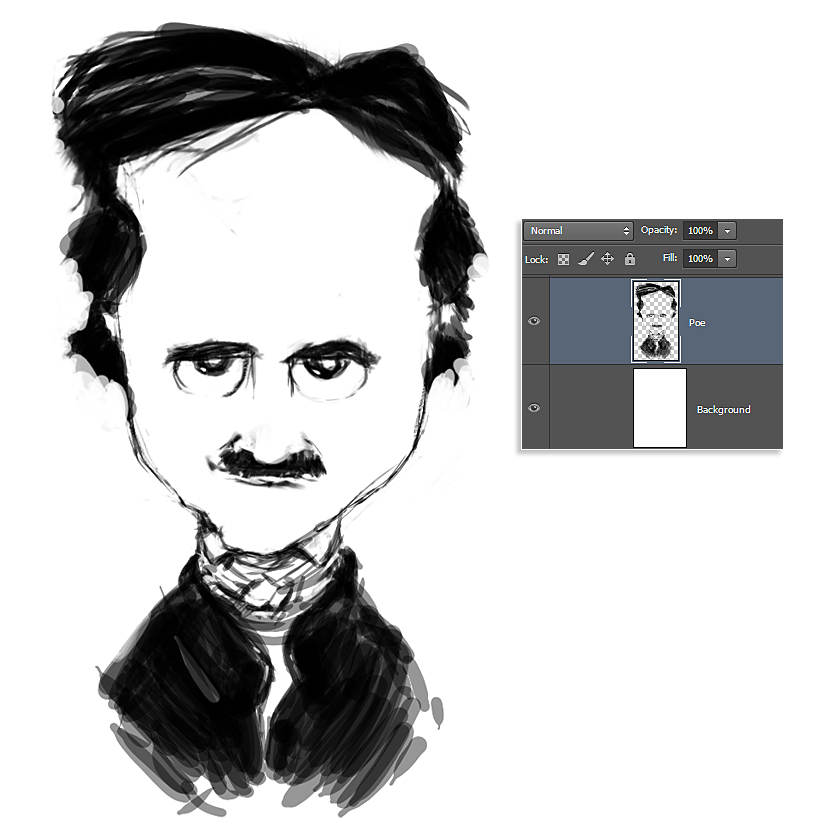
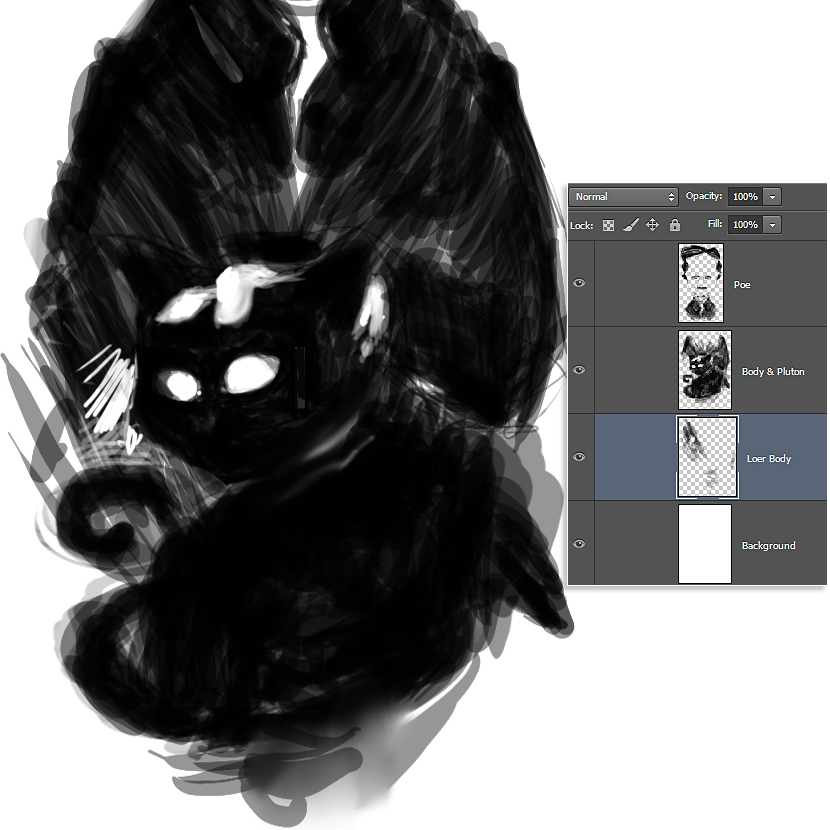
Step 3
Create a new layer “Poe”, and leave its default setting. With the Brush we created, start drawing the face, neck and shoulders, adjust the size to get thicker strokes on the garb, and thinner strokes for the face, hair, and neck. Draw flowing strokes, without taking much care on the detail, afterwards use the Erase Tool to remove the unwanted parts of the strokes. Also use the Erase Tool to create the eye’s brights.
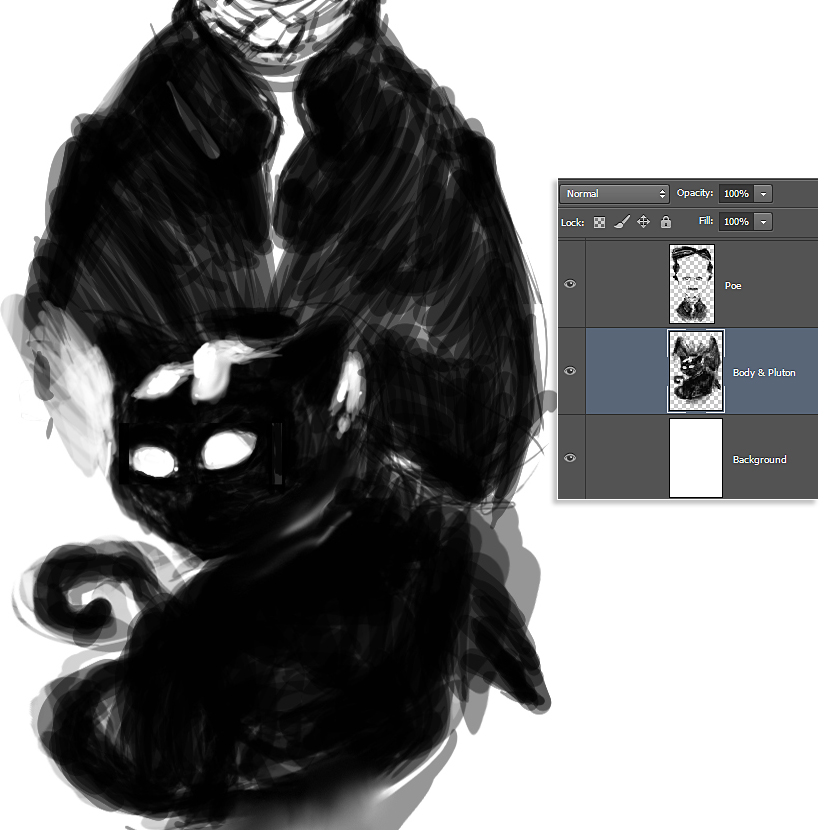
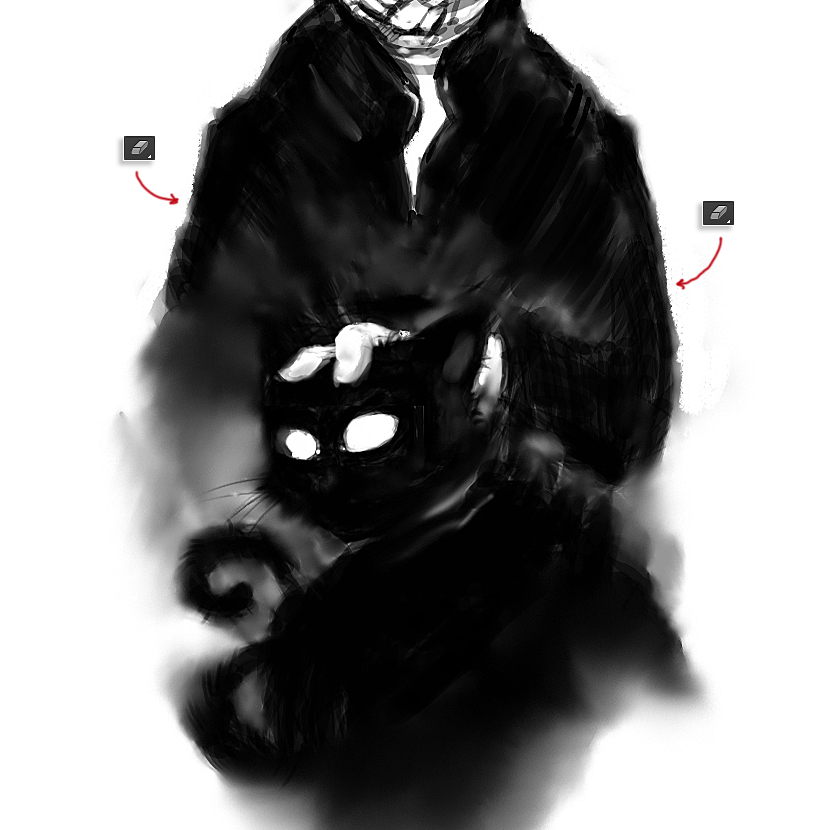
Step 4
Next, on a new layer “Body & Pluton”, start drawing the Poe’s lower body and Pluton. On the picture you can see that the strokes just establish the main forms, using stains instead of precise lines. Again, use the Erase Tool to remove certain areas as Pluton’s eyes and Poe’s fingers.
Step 5
We will add an extra layer “Lower Body”, where we will paint the area between Poe and Pluton. After, this will be useful for split the two elements and avoid to mix them together. Notice the erased area beside the Pluton’s head.
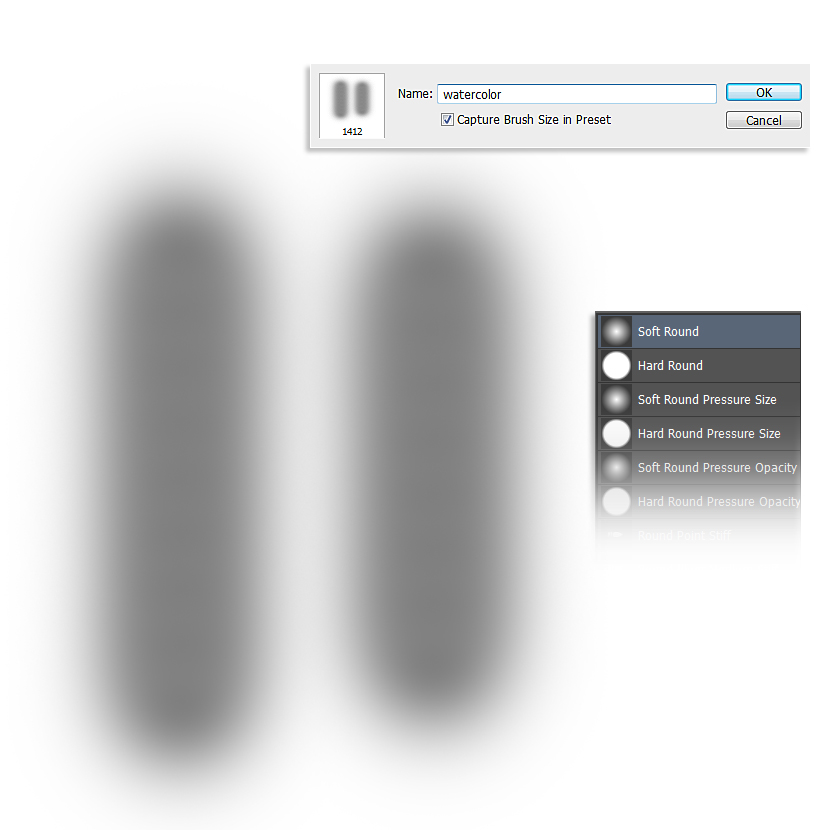
Step 6
Now, let’s start to create our custom watercolor brush. Use a new layer to paint two brush strokes as shown, using the Soft Round Brush. Notice that they aren’t symmetrical, this will be better for the final result. Next, go to Edit > Define Brush, we can name it “watercolor”, now it is ready on the Brush List for being used.
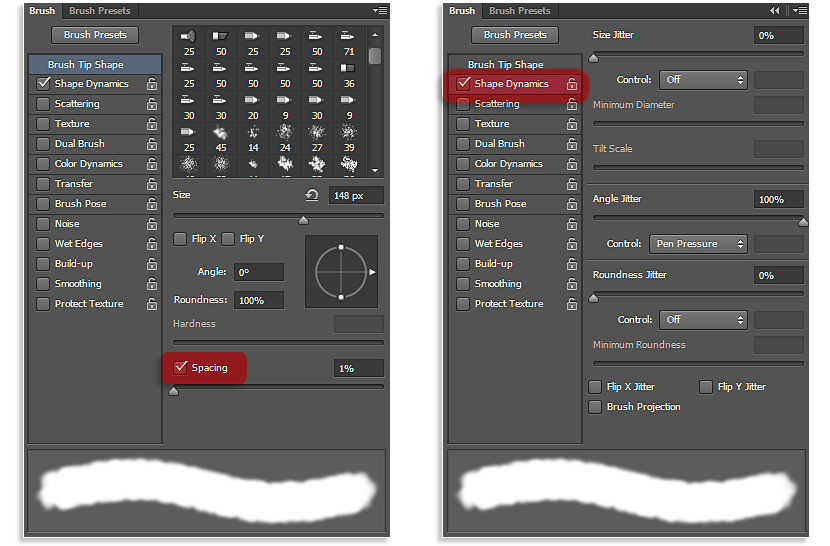
Step 7
Next, on the Brush Presets (F5), start setting the following adjustments, check the Shape Dynamics box, and adjust Spacing to 1%.
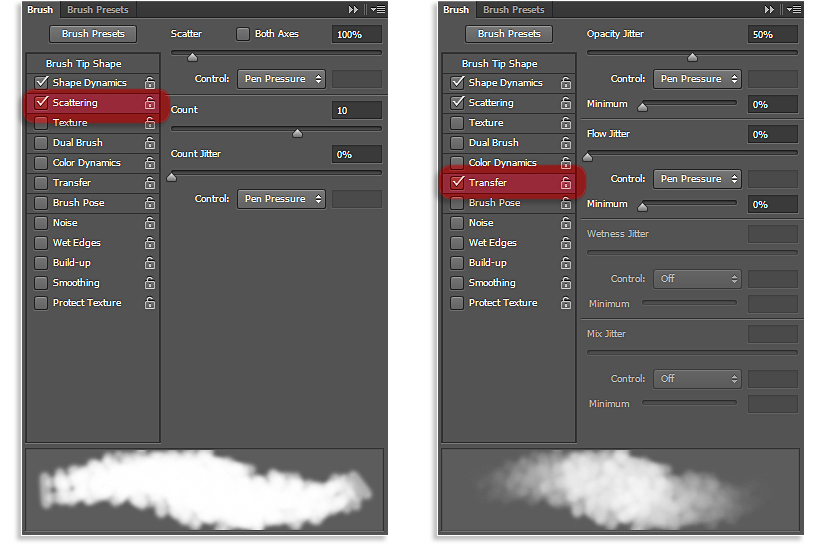
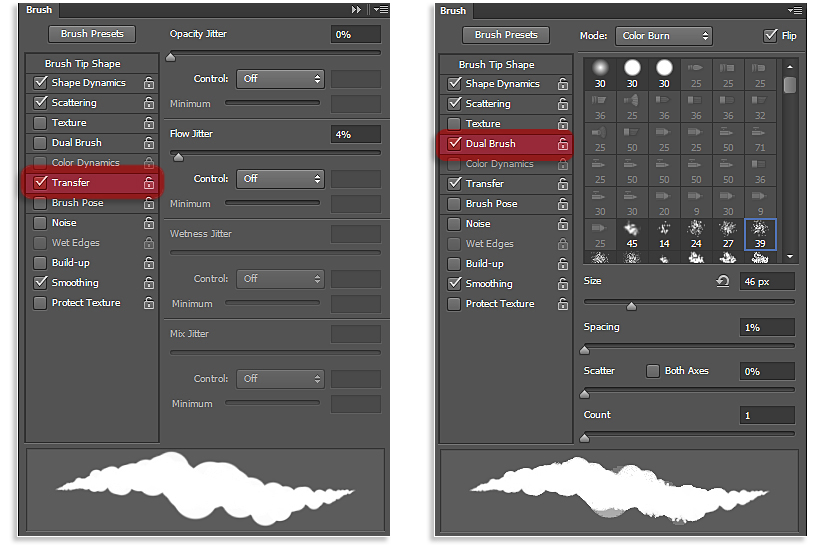
Step 8
Check the Scattering box and adjust its settings as shown. The same with the Transfer option. You can see how the brush shape changes on the display.
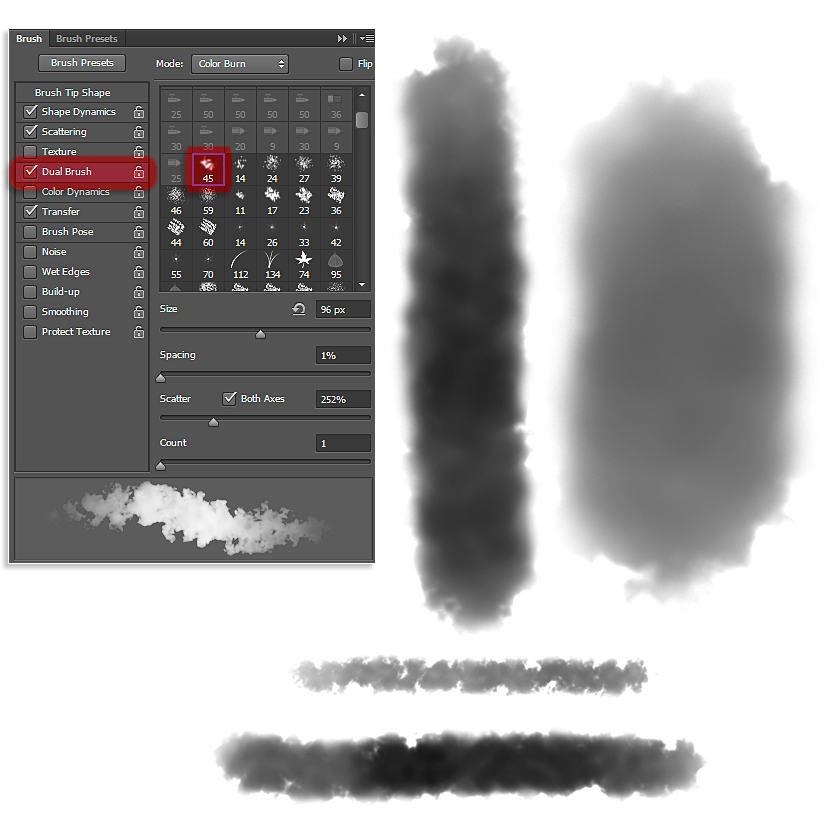
Step 9
Finally check the Dual Brush box and select the brush number 45 with the following settings. Now we have our watercolor brush ready for be used.
Step 10
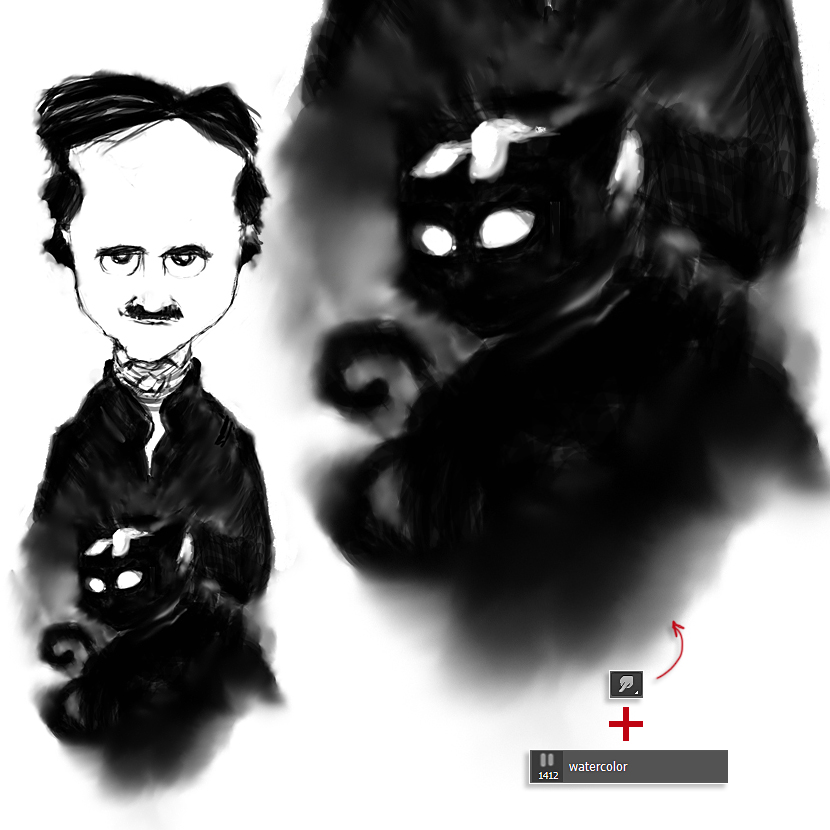
Pick the Smudge Tool, and with the watercolor brush, smudge the painted layers we created before. Adjust the Strength to get different results.
Step 11
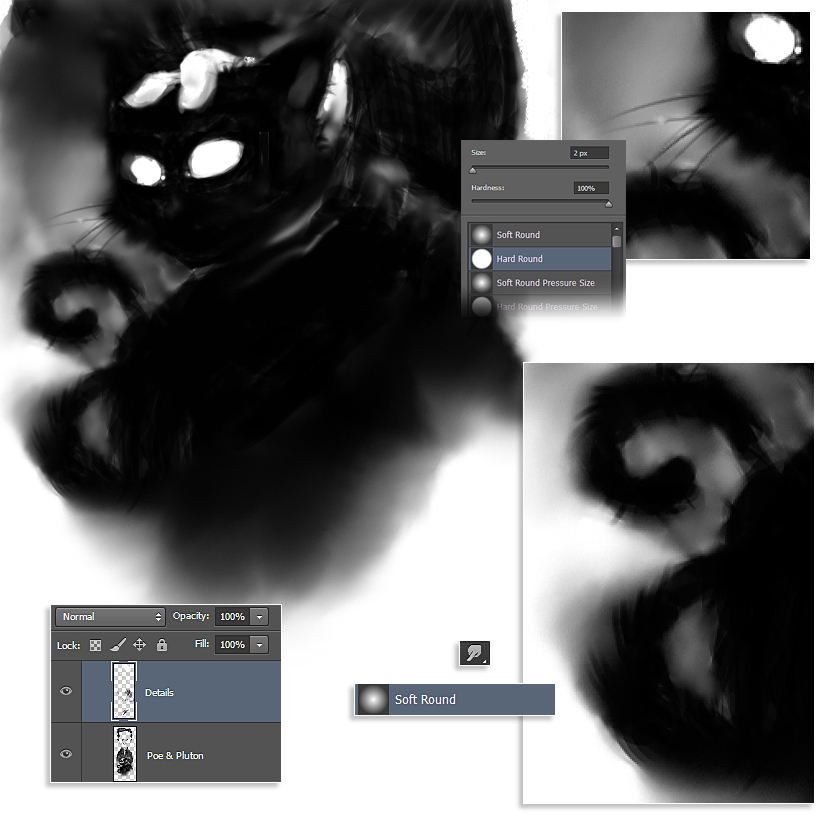
Create a new layer “Details” and with a Hard Round Brush paint the fine details as cat’s whiskers and some loose hairs. Next, with the Smudge Tool, and a Soft Round Brush selected, drag some portions of black to create more cat fur, with a small brush size selected.
Step 12
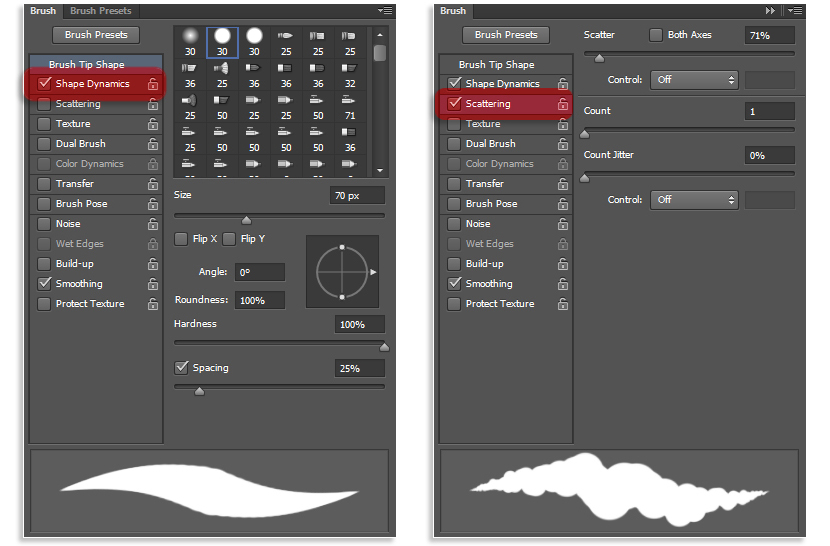
Now, we will create another textured brush. Using the brush number 30 as a base, apply the following settings on the Space Dynamics and Scattering sliders.
Step 13
Following with the Transfer and Dual Box adjustments.
Step 14
Picking the Eraser Tool, and the brush we just create selected, erase some edges of Poe’s suit to imitate a dry brush watercolor effect.
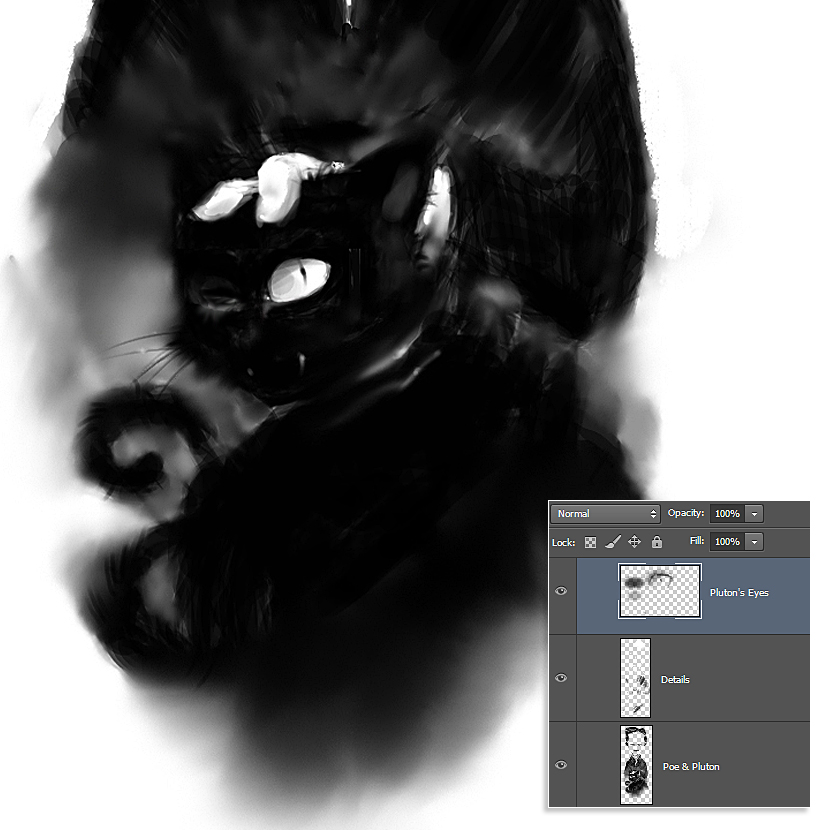
Step 15
Next, create a new layer “Pluton’s Eyes”, and on it draw the necessary brush strokes to draw the eye’s pupil, yes, remember that it only has one…and the eye’s shadows. With white color, paint the tusk and the eye’s brights.
Step 16
For the Poe’s face shadows, select the brush number 30 and adjust it as shown.
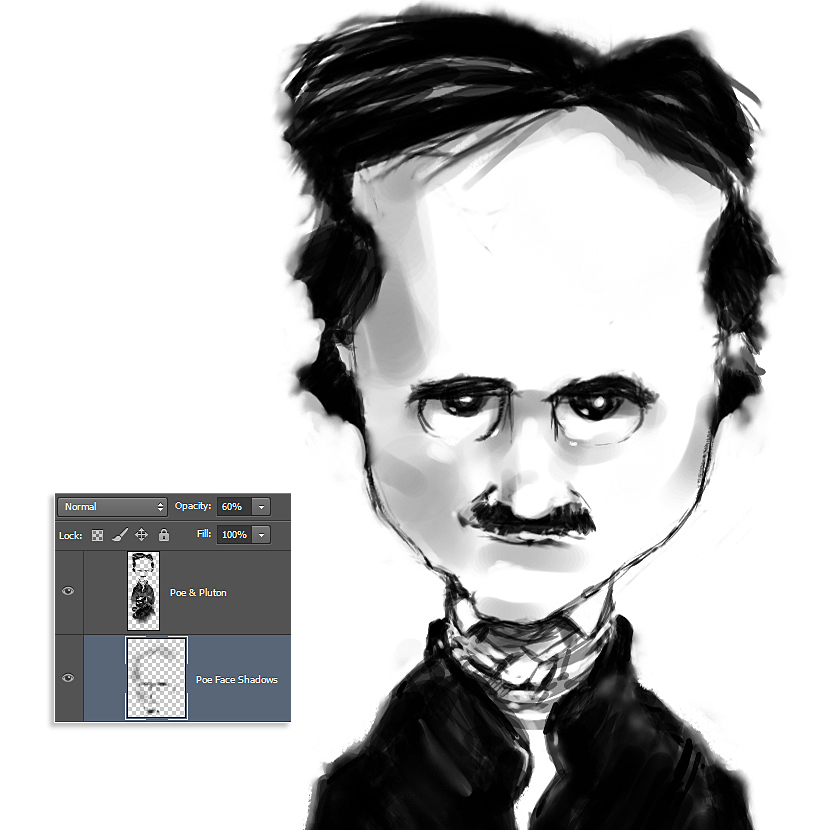
Step 17
For the Poe’s face shadows, create a new layer “Poe Face Shadows”, set its Blending Mode to Normal and 60% opacity. Start painting the shadows as cheeks, chin, eye sockets, etc. Overlap more than one brush stroke to achieve darker tones.
Step 18
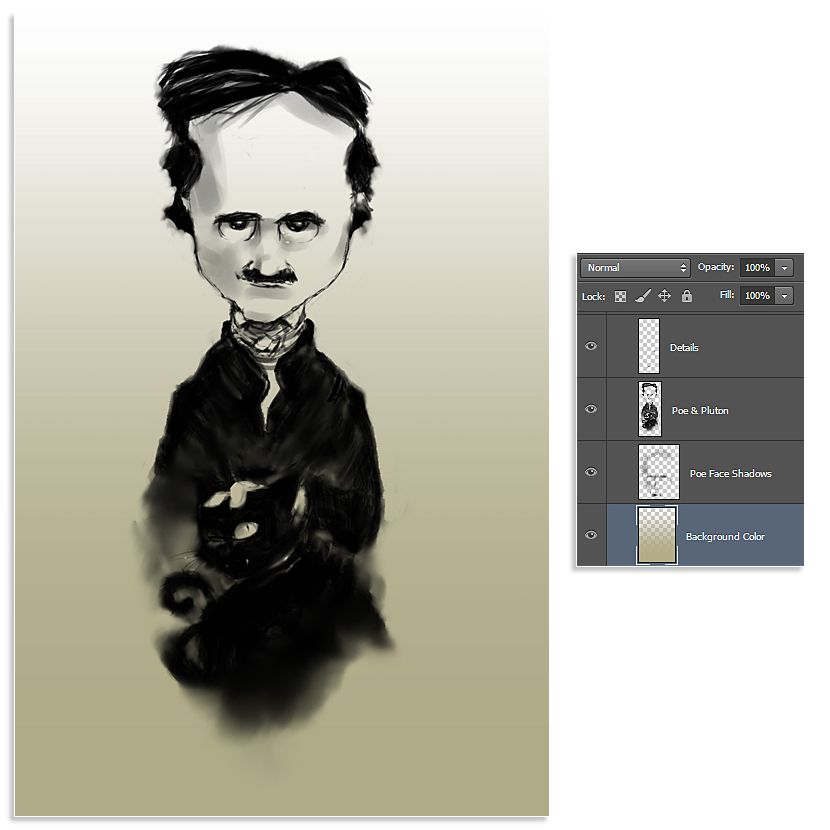
Let’s start with the background, create a new layer “Background Color”, just bellow of the layer we created before. On it, with the Gradient Tool, select a brownish tone and make a gradient from bottom to upper zone as shown.
Step 19
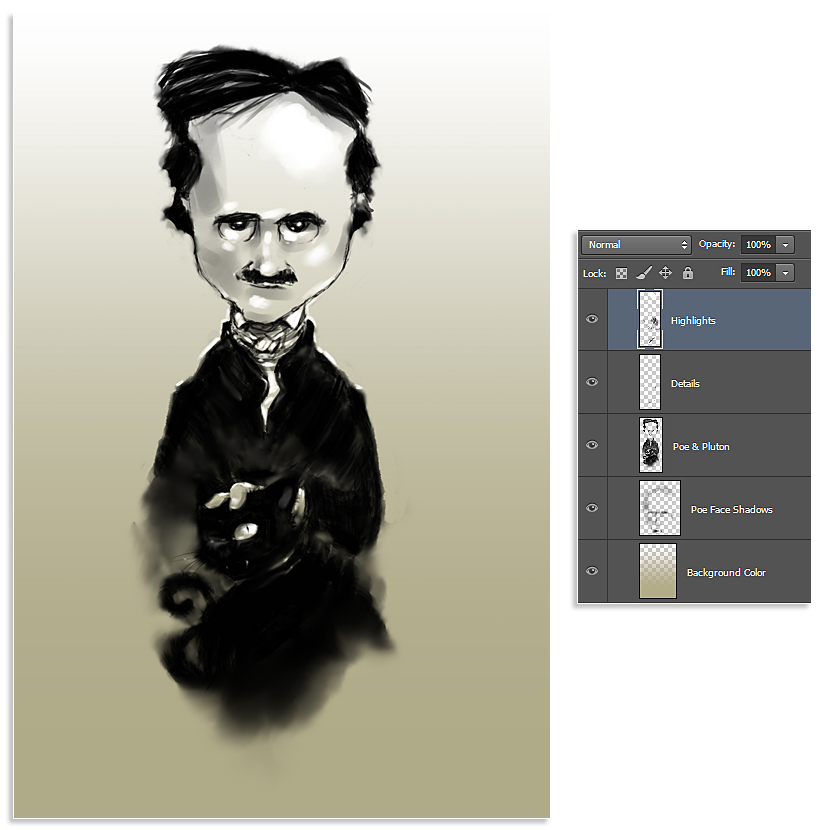
Next, to start making the lights, create a new layer “Highlights”, with the brush we created on step 16, select white color, and start painting the lights, I chose a cenital light, so it impacts on the upper areas of volumes as shown.
Step 20
To add some vignetting on the background, go to Filters > Lens Correction, and on the Custom tab you will find out the Vignette Amount slider, a quantity of -40 will be ok.
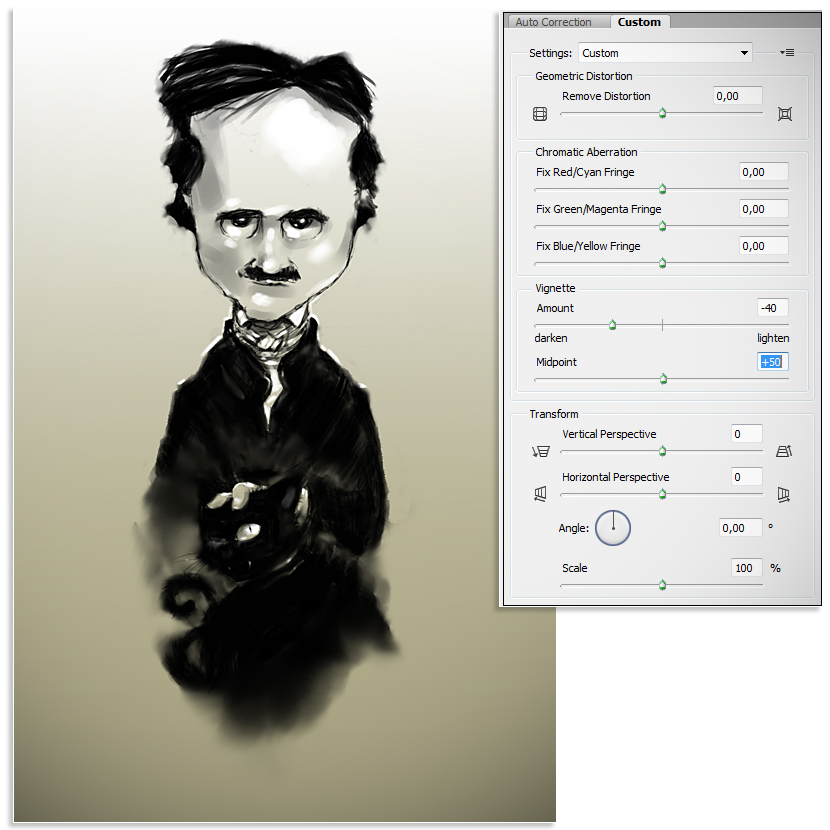
Step 21
To create the paper texture, we will add a real paper image. Create a new layer “Paper Texture”, set its Blending Mode to Multiply and 30% Opacity. Next, Copy and Paste the paper image on that layer.
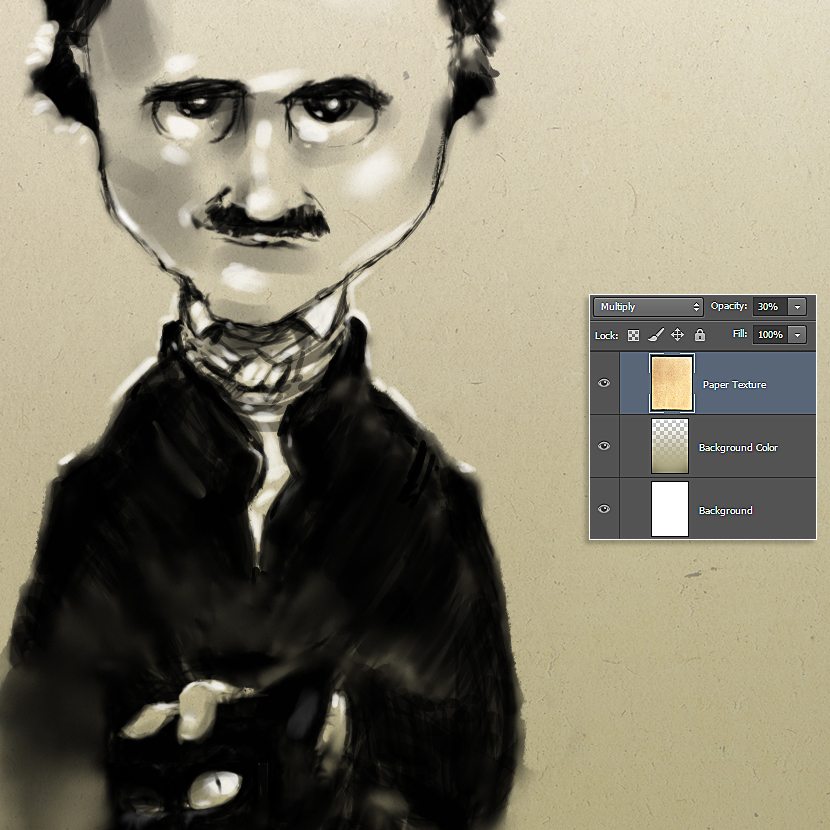
Step 22
Next, we will add an spotlight just behind Poe. Create a new layer “Spotlight”, set its Blending Mode to Lighten and 50% Opacity. With the Elliptical Marquee Tool, create a circle, place it behind the Poe’s shoulders and fill it with withe color, next go to Filter > Blur > Gaussian Bluer, and blur its edges. To avoid that the white overlap to Poe, create a Layer Mask and hide the unwanted areas.
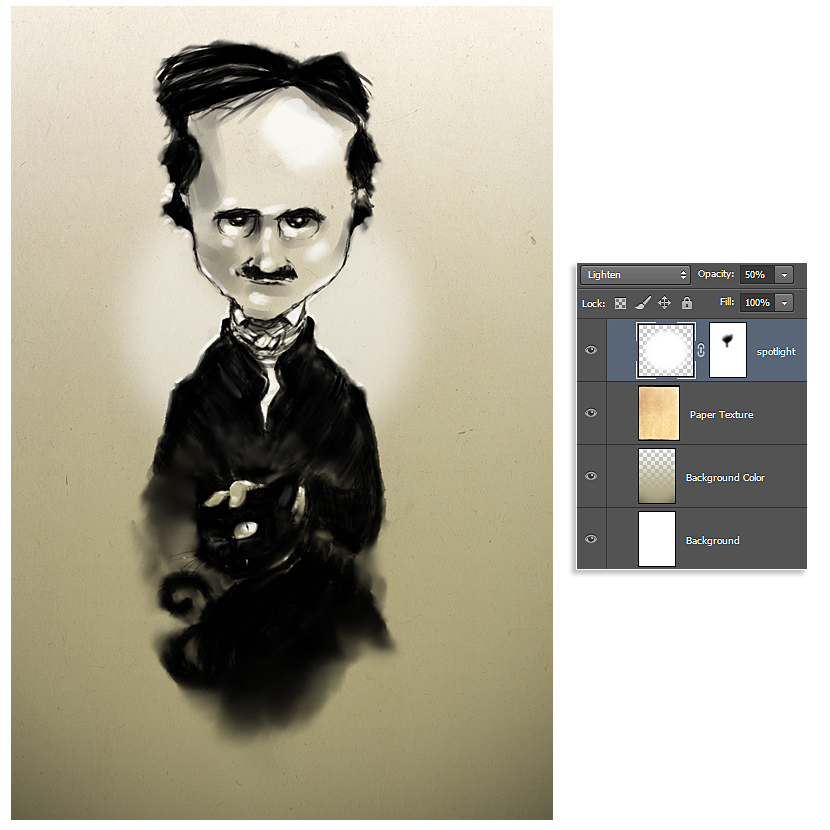
Step 23
Continuing adding textures, create a new layer “Ink Stain”, set its Blending Mode to Lighten and 80% Opacity. On it, place one of the ink textures you will find on the assets as shown.
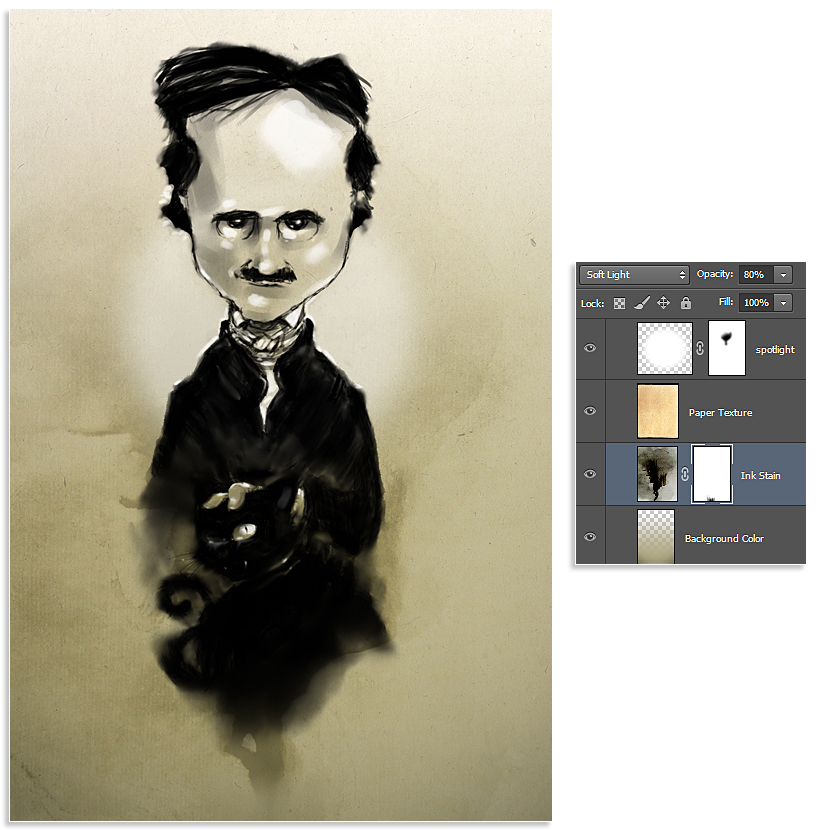
Step 24
More textures…Create a new layer “Aged Texture”, set its Blending Mode to Soft Light, and 80% Opacity. On it place again one of the ink textures from the assets to give an aged finish to the image. Notice that all textures are placed bellow Poe & Pluton’s layers, to keep them clean on other plane.

Step 25
Now the image is almost finished, create a new Group and put in it all the layers. Next save the document as .JPG, open it, and place this file on top.
Step 26
With the Dodge Tool, light up a bit some areas to create more contrast. The watercolor brush will be a good choice to do that.
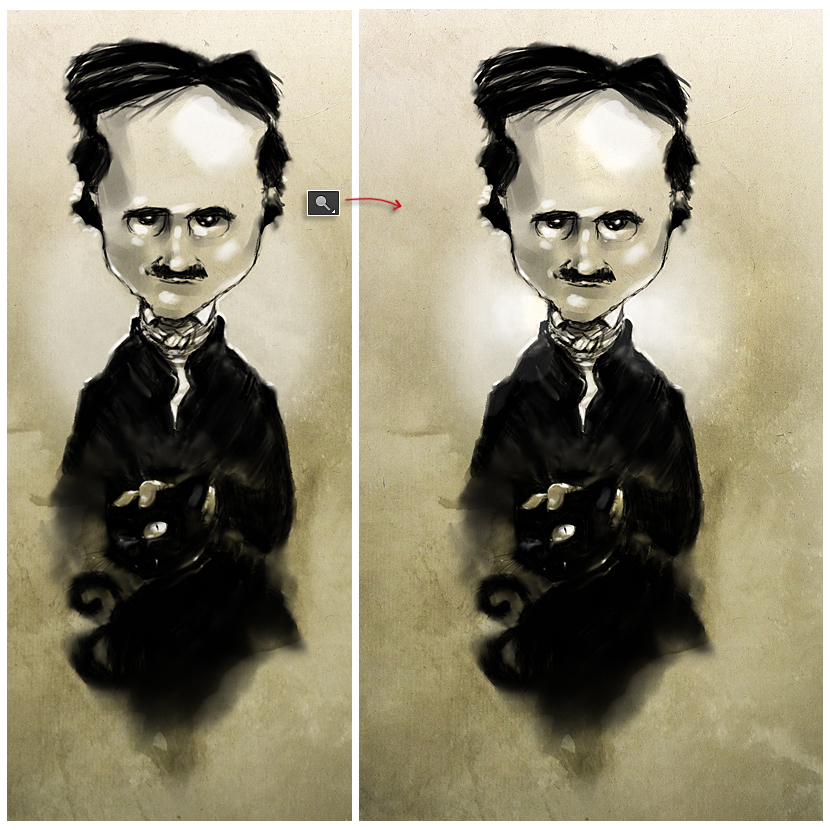
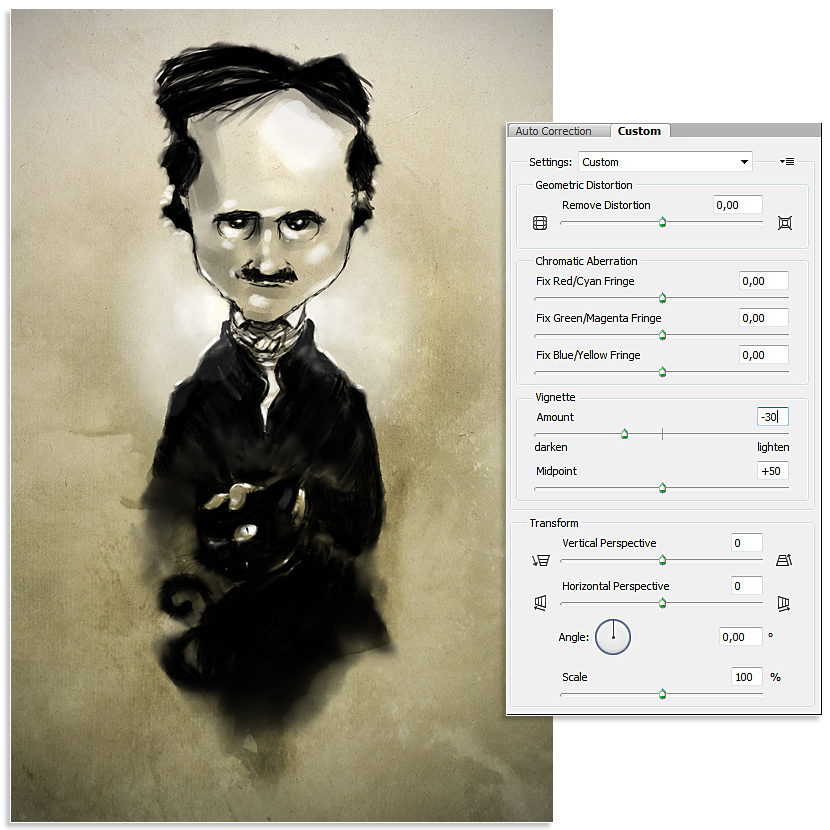
Step 27
Again, let’s add some more vignetting, go to Filters > Lens Correction, and adjust the Amount slider to -30.
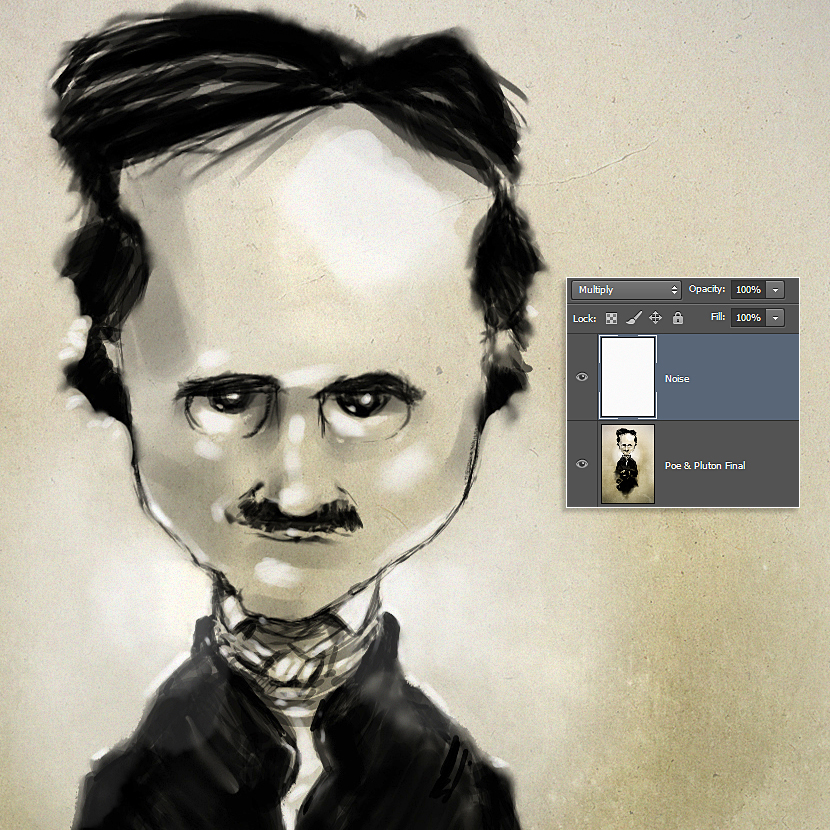
Step 28
Finally, to add some noise to the image, create a new layer “Noise”, set its Blending Mode to Multiply, and fill it (Shift + F5) with white color. Next, go to Filters > Noise > Add Noise, a quantity between 8 and 10 will work.
Step 29
And this is the final result