
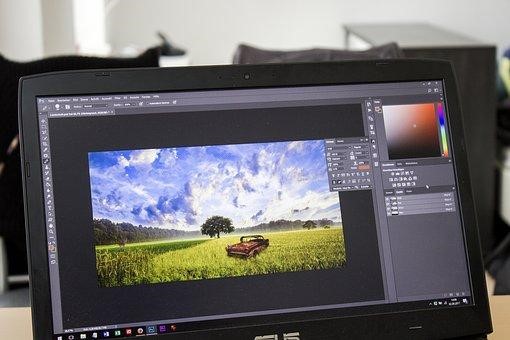
How to design a photo booth template with Photoshop
The photos are incredible keepsakes to remember the special moments that happen in our celebrations. These serve as a testament to the bonds and ties that unite us with our families and friends. Thanks to the advancements in modern technology, capturing our lives in stills has been already effortless, convenient, and seamless.
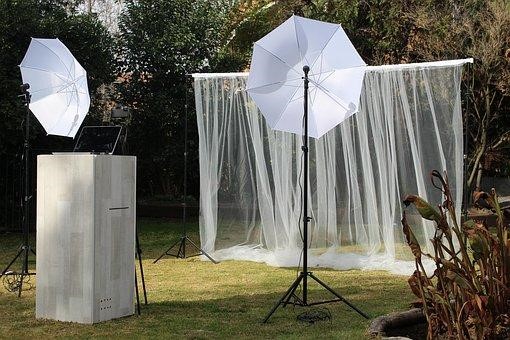
Hence, the emergence of portable studios we now know of as the photo booth, as well as the software that is widely used to edit photos, and more, which is Photoshop. Nowadays, there are many photo booth for rent that offer digital prints together with hard prints. There are even photo booths that can fit up to twelve people in a single layout. Furthermore, you are sure to find a photo booth for rent that will fit your budget. Conversely, with all the ready made templates available through various sources, designing your own photo booth template for that personal touch is sometimes more favorable, especially if you want to redo your design every once in a while. Read on below and follow the steps to customize your own photo booth template using Photoshop.
Set a size
The first step in making a template is setting the size of your canvas, which is set to the size of your photo booth prints. A 2592×1728 pixel dimension is the default for photo booth templates in landscape orientation. This can be translated into a 4x6in in dimension. Nevertheless, this may entirely be inappropriate for a strip print layout.
Create your layers
Photo booth prints are usually printed in three distinct layers which are the background, the image, and the logos and other special effects. The last layer is also referred to as the overlay graphics.
Background layer
Whatever you set as the background image is considered the overall background of your photo booth print. This layer is beneath the image capture or the customer photo. It is recommended for the background to be in neutral hues or plain colors to give more emphasis into the actual image captured. There are already various images that can be used as a background but keep in mind that the image should be 2MP or larger to guarantee that your background photo is not pixelated or blurry. If you decide to use an image from the web, download it and paste it on top of your blank canvas in Photoshop. In some instances, you may need to resize your image. Keep in mind that cropping your image to fit a smaller canvas will preserve the quality of the photo. However, enlarging it to fit a larger canvas will cause it to be pixelated.
Image layer
Place white squares on top of your background to denote where the customer images will be placed. These will serve as your markers. Save the canvas by selecting a filename for your template, as well as a folder or directory where you want it to be stored. Save your canvas in a JPEG format, which stands for Joint Photographic Experts Group, to denote it as a digital image with a high image quality. The image or the customer photos are technically not part of the template creation. But to have a complete overview of the process, the white markers on top of your custom background will greatly help you to depict where these images will be placed later on. Ultimately, you can also use other shapes as your markers, as long as you will be able to print the captured images in the same shape.
Overlay graphics layer
The final and third layer of the photo booth prints is the overlay graphics layer. It is recommended to use images in PNG or Portable Graphics Format, which entails that its background is transparent. This will make it easy for you to copy and paste the image directly into your canvas without affecting the background layer that you have set. There are several PNG images from the web that you can use in this layer. However, if you cannot find a certain image without a background, you can further edit the PNG image to remove the background. Simply open the image in another Photoshop window and use the select and delete tool of Photoshop to remove the background. Once the background is deleted, you can proceed with copying over the image and pasting it onto your canvas with a background to decide on a specific layout on where the overlay images will be placed. To be able to retrieve your overlay images later on, make sure to save these on a transparent background, but with the same dimension as your canvas with the background layer.
Make the magic happen
The last and final step is to bring everything together and make the magic happen. If you have a Windows operated PC, just upload your background in JPEG format in Photoshop, together with your overlay graphic as a logo file. Make the final adjustments and set everything into position. If you are using a Mac, adding the layers onto the software may slightly be different. Nevertheless, you still need to upload your background JPEG format in Photoshop, together with your overlay graphic as a logo file. However, you need to select your third layer from the appropriate SLR drop down. You can do the final adjustments in setting the position on the SLR template layouts.
Other alternatives
There are also other photo booth template markers that you can use instead of Photoshop, which are friendly even for beginners without any graphics background. These are typically the WYSIWYG software, which stands for ‘what you see is what you get’. Most of these have built-in photo booth markers, which will definitely make your life easier.
The advancements in modern technology opened the doors to so many amazing wonderful innovations. The manner that we capture photos to document our celebrations is of no exception. With software such as Photoshop, and portable studio technology through a photo booth, getting a keepsake to remember fleeting moments that happen in celebrations is already an uncomplicated process.