
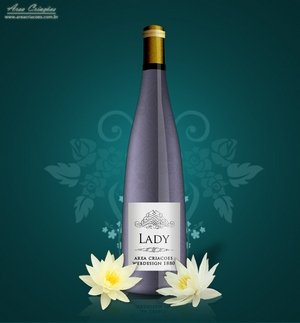
In this tutorial I will teach how create a realistic bottle illustration and some shadow and cut techniques.
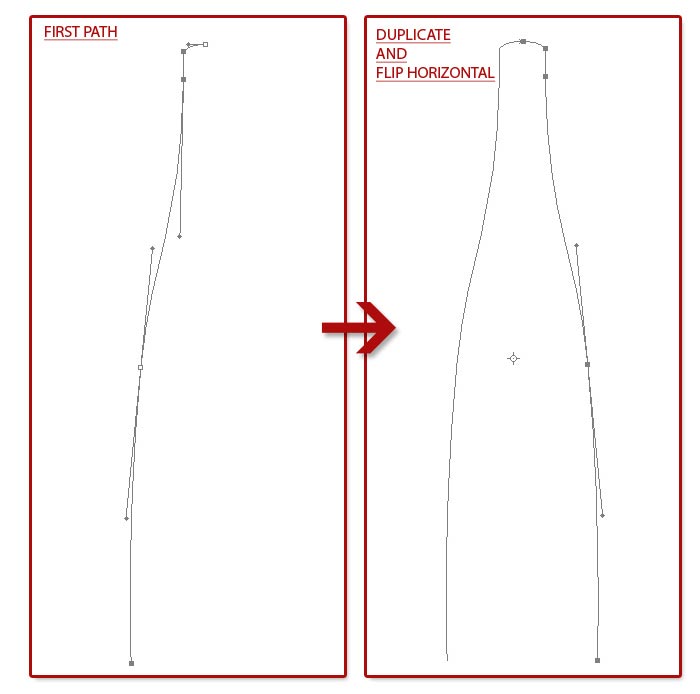
Step 1
Create a new file with 700px of width and 700px of height. Now use the pen tool (shortcut “p”) to draw one side of bottle. When you reach the desired result now use the Direct Selection Tool (shortcut “a”) to select all point of path, hold ALT and drag the path to duplicate. Now, still using Direct Selection (Shortcut “a”) select all point of the second side, right click and select “Free Transform Path“, go to menu “Edit/Tranform Path/Flip Horizontal“. Place the flipped path on the right place to create the bottle silhouette.
Step 2
Now, we need to close the silhouette. First, using the pen tool(“p”) close the top of bottle. Go to the bottom o silhuette and do the same thing but with a little curve between points. Like above:

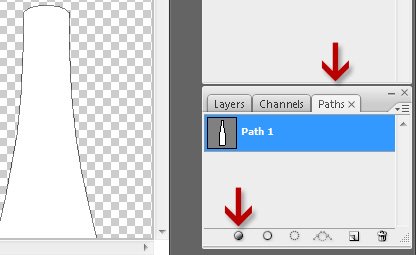
Step 3
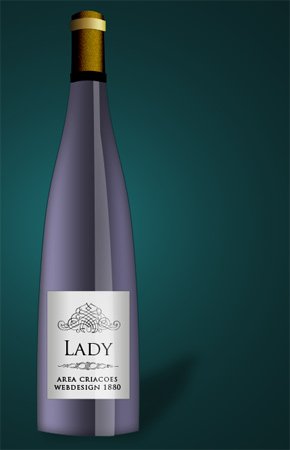
Go to the “Paths” tab and click on fill option button at bottom of panel. After this, make sure your path layer still there on paths tab, never erase or overwrite the layer of the bottle path. Now we have the bottle, but we need some color and realistic details, in most cases this can be done using some gradient and shadow effects. To apply Gradient without lost the initial shape we use the blending options.
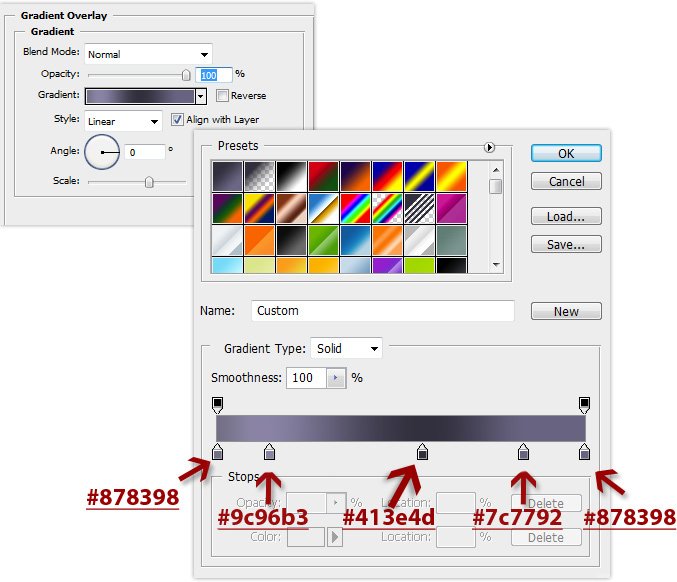
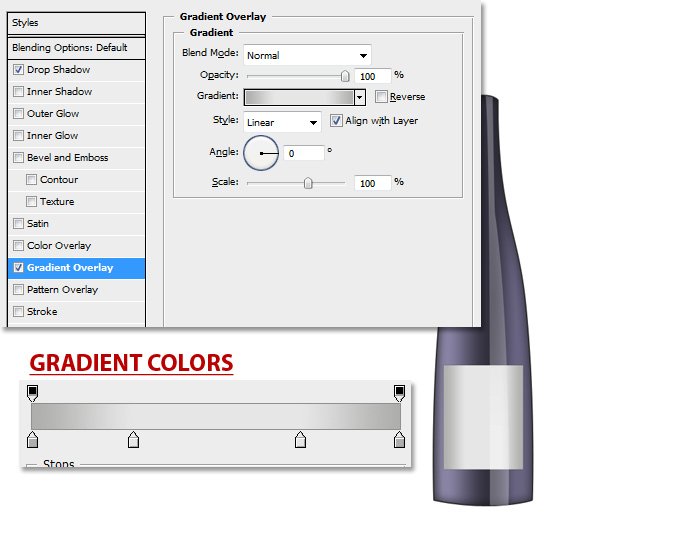
Step 4
Go back to the layers tab and right click on the bottle layer and select “Blending Options“. Check the Gradient Overlay, define Style to Linear and Angle to 0 and double click on the Gradient field to open the Gradient Editor. Create a new custom gradient using the color #878398,#9c96b3,#413e4d,#7c7792,#878398. Like below:
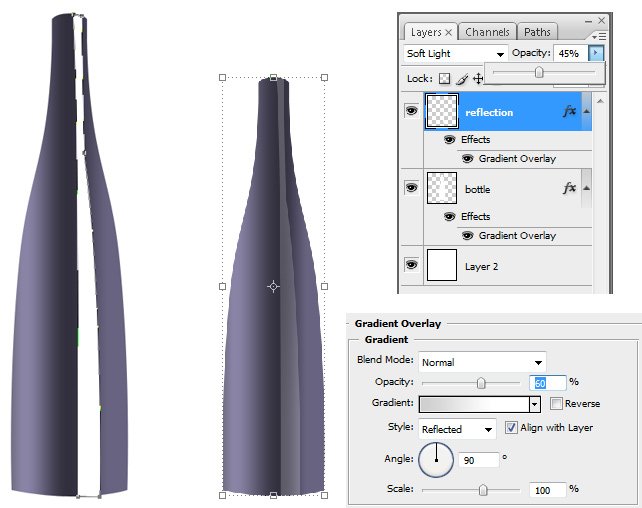
Step 5
Create new layer and change name to reflection. Go to the paths tab, duplicate the bottle path(right click on the path layer) and resize the points of path to reach the first image above. Fill the path with white color. Back to the layer tab, apply a gradient overlay in blending options and set the Gradient Fill with some white and gray color and define the opacity field to 60% and close the Blending Options window. Now go to the blend mode of the reflection layer and set to Soft Light and change the opacity to something like 45%:
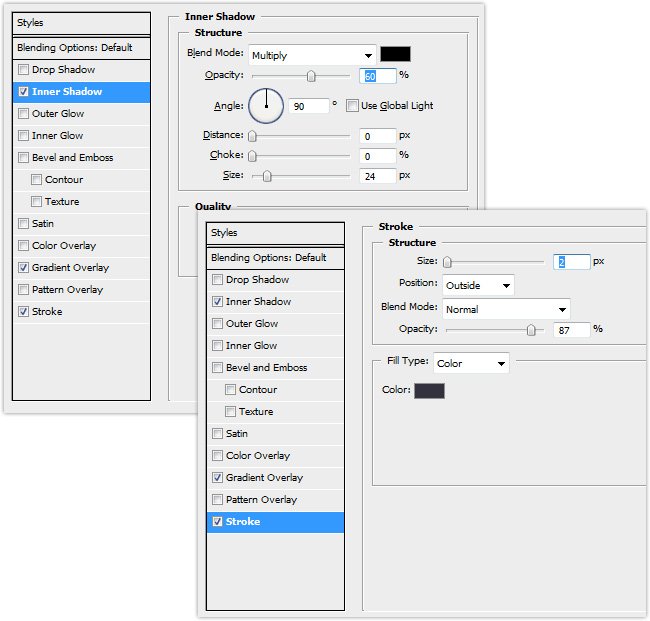
Step 6
Go back to the blending options in the bottle layer and define inner shadow like below, and create a Stroke like below:
Step 7
We need a label for wine glass. Create a new rectangle with Rectangle Tool, place the rectangle layer between reflection layer and bottle layer, rename it to “label”. Go to Blending Options again and apply a dropshadow with 41% opacity, distance 0 and size of 2. Now apply a Gradient Overlay with the settings like below:
Step 8
Create some texts like the title and some description to fill the space, use old style fonts, for me Trajan Pro is a good one. Add some vector shapes with old flourishe style, the result will be something like this:

Step 9
Create new path with the stopper shape, fill with brown collor(#988c6c). Go to Filer/Noise/, Add Noise and set the Amount value to 5. Now it’s to other gradient, add gradient overlay in blending options windows on this layer. Define Blend Mode of Gradient Overlay to Vivid Light and set angle to 0 and create a gradient #000000 to #957c34 and back to #000000. With this step we get a good stopper like below:
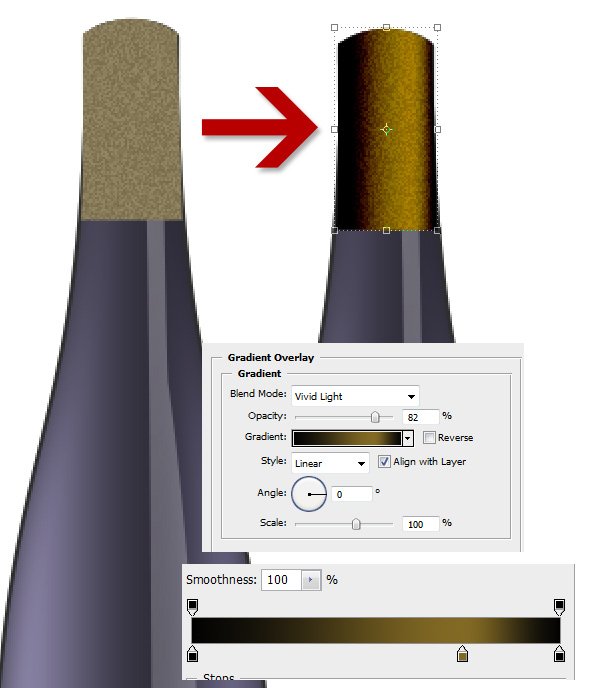
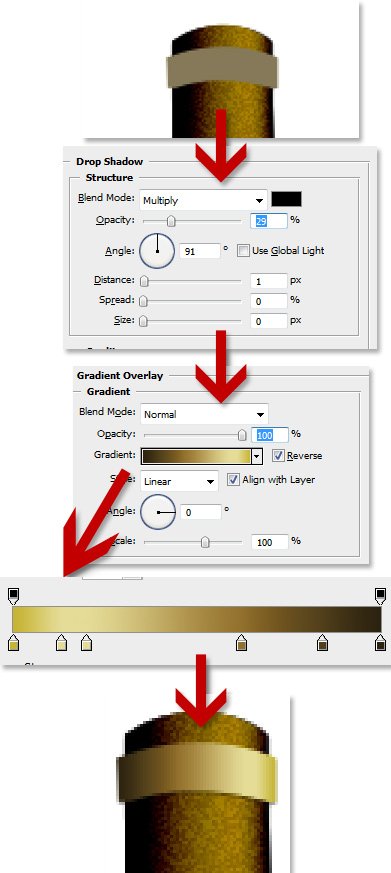
Step 10
Now we jump to details. Create a new layer and a simple path to reproduce a ring on that layer, fill it. Create a dropshadow with Blending Options like below and add a Gradient Overlay. Use the colors to reproduce gold material (I use these #d1c04c,#eae2aa,#a48440,#645025,#3a2e14). Look step by step below:
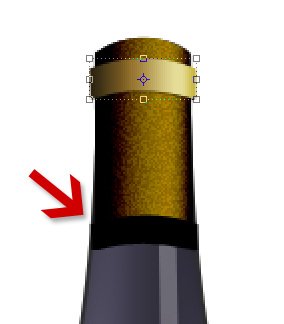
Step 11
More details. Create duplicate the stopper path and change her size to wrap the neck, fill it with black:
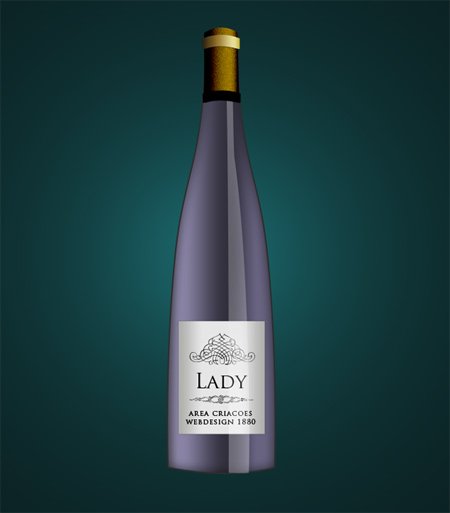
Step 12
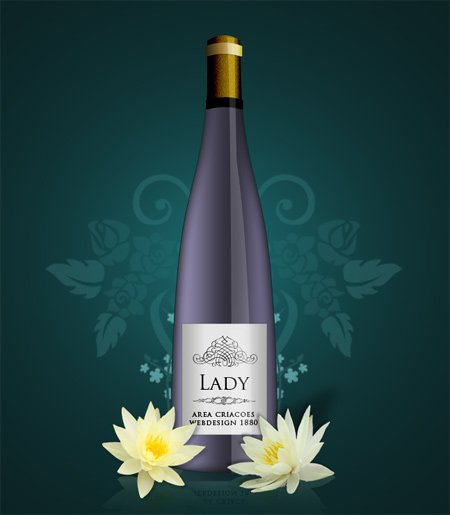
We almost finish. To create a coll background select #063e41 color and fill a background layer of document. Go to Filter/Render/Lighting Effects and select Omni Light Type.
Step 13
Now we need a realistic shadow. Duplicate the bottle layer, remove all effects(right click on layer “Clear Effects“), go to Edit/Transform/Wrap menu or hold CTRL on the edge o shape and resize it to reach this result:
Step 14
Go to Image/Adjustments/Hue Saturation menu or press CTRL+U on windows. Change the lightness to -100. Go to Filter/Blur/Gaussian Blur menu and set it to 8. Change the opacity of layer to 34%:
Step 15
Add some flowers. Open this images on photoshop, go to Channels tab select the most contrasted channel, duplicate him, increase the constrast of duplicated channel layer in Image/Adjusments/Brightness/Contrast and Image/Adjusments/Curve, use Quick Selection Tool(“w”) to create a fast selection of areas outside the flower. Delete the duplicated channel, back to the RGB channel, right click on the selection and select inverse. Cut and paste the flower on the bottle document. Repeate the same step to cut other flower. Othe tip is increase the brightness of flower (Image/Adjustments/Curves) to made things more white. Define some dropshadow in Blending options for eache flower:

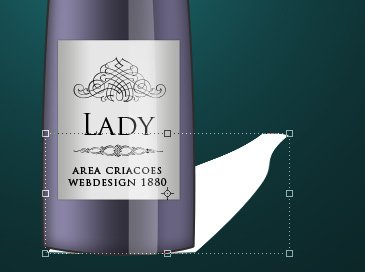
Step 16
Use some vectors like this and change the blend mode of vector layer to Luminosity and opacity to 50%. We also add an reflection effect in the bottle(we can teach how create reflection in some other tutorial):
Conclusion
With this tutorial you learned how create a realistic bottle, shadows and how work with Blend Mode, Gradients. With some easy steps you can reach a good effect.
